A bartender supplies checklist should prepare you for a real shift, not just make your home bar look impressive. When tickets are printing, guests are waiting, and you need to make the same drink correctly for the third time in two minutes, the right tools matter. So does knowing what each tool is for, where it belongs, and how to use it without slowing down.
For beginners entering Rhode Island’s restaurant, bar, and event scene, the goal is simple: build a practical foundation, practice the core techniques, and arrive ready to learn each employer’s specific setup. You do not need to buy every gadget sold in a cocktail shop. You need reliable supplies that support speed, consistency, cleanliness, and responsible service.
Start With the Bartender Supplies Checklist That Fits Your Goal
Your checklist will look different depending on where you plan to work. A high-volume neighborhood bar may prioritize fast pours, beer service, and simple mixed drinks. A cocktail-focused restaurant may expect more precise measurements, fresh ingredients, and advanced shaking or stirring technique. Catered events often require portable, durable equipment and a strong focus on setup and breakdown.
If you are training from scratch, start with the tools used across nearly every environment. Choose commercial-quality equipment when possible. It does not have to be expensive, but thin or poorly made tools can make practice frustrating and do not hold up well in regular use.
Core hand tools
These are the working tools a new bartender should know before applying for entry-level bar positions:
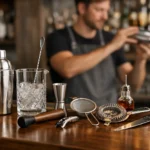
Cocktail shaker: A Boston shaker, made with a metal tin and mixing glass or second tin, is common in professional bars. A cobbler shaker has a built-in strainer and is easier for some beginners, but it is often slower during a busy shift.
Jigger: Use a double-sided jigger for accurate pours. Common measurements include 1 ounce, 1 1/2 ounces, and 2 ounces. Free-pouring is a valuable skill, but measuring first teaches consistency and cost control.
Hawthorne strainer: This spring-coil strainer fits over a shaker tin and keeps ice and larger solids out of the finished drink.
Fine-mesh strainer: Also called a tea strainer, this tool catches small ice chips, citrus pulp, and herb pieces. It is especially useful for shaken cocktails served up.
Bar spoon: Its long handle reaches the bottom of tall mixing glasses and is designed for controlled stirring. It also helps with layering and small ingredient measurements.
Muddler: A sturdy muddler presses herbs, fruit, and sugar gently to release flavor. Avoid crushing mint into a bitter, shredded mess. Press and turn with control.
Citrus juicer and channel knife: Fresh juice matters in many classic cocktails. A handheld citrus press is practical, while a channel knife helps create clean citrus twists.
Bottle opener, wine key, and bar knife: These three tools solve a large share of everyday service needs. A double-hinged wine key is the standard choice for restaurant work.
A speed pourer is another essential once you begin practicing with bottles. It allows a steady, controlled stream and supports accurate free-pouring. Keep extra pour spouts available because they can become clogged, bent, or misplaced during service.
Glassware for Training and Service
You do not need a full restaurant inventory at home, but you should recognize the glasses used for common drinks. Glassware affects presentation, portion size, temperature, and guest expectations. Serving a Manhattan in a highball glass may not change the ingredients, but it tells an experienced guest that the bartender does not understand the drink.
Start with a small, useful set: rocks glasses, highball or Collins glasses, pint glasses, coupe or martini glasses, wine glasses, and shot glasses. Add a mixing glass for stirred cocktails. If budget is tight, buy two of each rather than a large, mismatched assortment.
For professional service, durability matters as much as appearance. Bars usually select glassware that can handle repeated washing, stacking, and fast handling. At home, practice placing glassware carefully, checking rims for chips, and holding the glass properly to avoid warming a chilled drink with your hands.
Ice and garnish supplies
Ice is an ingredient, not an afterthought. It chills, dilutes, and changes the final texture of a cocktail. Keep an ice bucket or insulated container, ice scoop, and ice tongs in your setup. Never use a drinking glass to scoop ice. That shortcut creates a safety issue and would not be acceptable in a professional bar.
For garnishes, have a cutting board, sharp paring knife, peeler, food-safe storage containers, cocktail picks, napkins, and clean bar towels. Practice cutting consistent lemon wedges, lime wedges, orange twists, and cherries for presentation. A rushed garnish often looks minor to the bartender but can make a finished drink feel careless to the guest.
Ingredients Worth Keeping for Practice
A practice bar does not require a wall of premium bottles. Start with a small selection of base spirits: vodka, gin, rum, tequila, whiskey, and bourbon. Add dry vermouth, sweet vermouth, orange liqueur, and a basic bitter such as aromatic bitters. These ingredients allow you to practice a wide range of classic builds without overspending.
Keep simple syrup, grenadine, soda water, tonic water, ginger beer, citrus, olives, cocktail cherries, and salt on hand as needed. Buy fresh citrus in small quantities so you can work with good juice. Vermouth should be refrigerated after opening because it is wine-based and loses quality over time.
There is a trade-off here. A larger ingredient collection gives you more recipes to practice, but it can lead to waste and scattered learning. It is smarter to master a focused group of drinks first: the Old Fashioned, Margarita, Daiquiri, Manhattan, Martini, Mojito, Whiskey Sour, and highball variations. These drinks teach shaking, stirring, building, measuring, muddling, dilution, and garnish work.
The Supplies That Protect Speed and Safety
Guests see the finished drink. Employers also notice the habits behind it. Your bartender supplies checklist should include sanitation and service items that support a clean, organized station.
Keep clean bar towels separated by purpose. One can be used for wiping the bar, another for handling spills, and another for polishing glassware. Have sanitizer approved for food-service surfaces, a labeled spray bottle, disposable gloves for appropriate prep tasks, a trash container, and a bus tub for dirty glassware. Check local workplace rules and your employer’s procedures, especially around chemical storage and cleaning schedules.
A bar mat protects the work surface and helps keep tools in place. A spill mat, bottle rail, garnish tray, and ticket holder can make a busy station easier to manage. At home, you may not need every one of these items, but practicing with an organized workspace builds habits that transfer directly to the job.
Responsible alcohol service supplies matter, too. Depending on the venue, this may include ID-checking procedures, incident documentation materials, and a clear understanding of when to slow service, offer water, or involve a manager. Certification and sound judgment are just as important as your ability to make a clean Negroni.
Build Your Kit in the Right Order
New bartenders sometimes spend too much on specialty tools before they can confidently measure, shake, stir, and pour. Start with a shaker, jigger, strainer, bar spoon, muddler, wine key, bottle opener, citrus juicer, cutting board, knife, and basic glassware. Add a fine strainer, speed pourers, garnish tools, and bar mats as your practice becomes more advanced.
Avoid novelty equipment that only makes one drink or looks good on social media. A professional bartender earns trust by being efficient and accurate, not by carrying the largest kit. The exception is a mobile bartender or caterer, who may need more duplicate tools, storage containers, portable ice equipment, and backup supplies because there is no established bar station to rely on.
Practice the System, Not Just the Recipe
Owning the right equipment is useful only when you can work with it calmly. Set up your practice station the same way every time: spirits within reach, tools in a consistent place, clean glassware ready, garnishes prepped, and sanitation supplies available. Then make drinks in rounds. Build two or three orders, clean your station, and reset it before starting again.
Pay attention to small details: Did you measure every pour? Did you use fresh ice? Is the outside of the glass clean? Did you return bottles to their proper position? These are the habits managers notice during a working interview or first training shift.
At Innovative Bar Institute, hands-on training helps students connect these supplies to the pace and standards of an actual bar environment. That difference matters. A checklist can tell you what to buy, but guided practice teaches you how to move, prioritize, and stay composed when the bar gets busy.
Start with the essentials, practice with purpose, and add to your setup only when it supports the kind of bartender you are working to become. The best bar kit is not the most expensive one. It is the one you can use confidently when a guest is waiting.